Tom MacDonald put out “What America Is” as a single on October 16, 2026. The video runs 2:22, and he’s listed as the writer. The official video went up the same day on his YouTube channel, which has 5.27 million subscribers. It had about 64,000 views and 13,800 likes within hours (as of publishing).
We gave it a listen at Backroad Reviews, and the first thing Ryan said was, “That’s us. That’s the real us.”
“It’s time we focus on the good, time we voice our opinions about the bad, and work together to keep each other safe, secure, happy, and healthy,” Ryan said. “This one really struck home with me.”
Watch Our Reaction
Ryan sat down for his first listen and shared his honest reactions along the way. Watch it above, then let us know in the comments if this song sounds like your town too.
Why This One Hits Home for Us
When we think about what America looks like out here, it’s not a debate on TV. It’s the neighbor setting off fireworks on the porch. It’s big tires on the 4×4 and a muddy trail on Saturday. It’s a fry out where nobody asks how you voted before handing you a plate.
That’s the community we live in. You’re a friend here whether you agree with us or not. You’ll still get invited to the parties and the cookouts. The only rule is simple: don’t bring drama into the community.
That’s the feeling we got from this song, and it’s why we wanted to review it.
In Ryan’s Words
This was our first reaction video ever, and here’s some of what Ryan said while watching.
On the weekend scenes: “Putting the tailgate down to the square body, casting the fishing pole out to the pond and jamming out with your friends, that’s what it’s all about. You put in your work week, and you’re going to let loose a little bit.”
On the faith in the video: “Lately Tom has been putting the Lord in most of his videos… it’s such a huge part of why I like Tom MacDonald.”
On the message: “Whether you see things the way I see them, or maybe we don’t see eye to eye, we’re Americans. And that’s important.”
On community: “You’re seeing a community having fun together and relaxing together. But this is also the community that pulls together when things start to go awry, to take action and come up with solutions.”
His bottom line, summing up Tom’s message: “We don’t have to be friends, we just have to be Americans, and that is really so true.”
What We Liked
It’s short and to the point. At under three minutes, it says what it wants to say and gets out.
It’s about people. For us, it lands as a song about everyday folks and the places they call home.
It fits the backroads life. Porches, trucks, fireworks, friends. It’s a good soundtrack for the kind of weekend we film.
It’s Tom doing it his way. He writes his own material as an independent artist, and you can hear that.
A Quick Note
Tom MacDonald’s music can be blunt, and some of his songs are labeled explicit. Give it a listen first before you play it at the family fry out. We’re reviewing the song for what it means to our community, not to pick a side in anyone’s politics.
Our Verdict
“What America Is” captures the spirit of the folks we ride with, cook with, and celebrate with. It’s not about who’s right. It’s about who shows up. For us, that’s a thumbs up.
Have a listen and tell us in the comments: what does America look like where you live?
Disclosure: Topsy Products sent us this bracket free in exchange for an honest review. The opinions here are our own. This post also contains affiliate links. As an Amazon Associate I earn from qualifying purchases, at no extra cost to you.
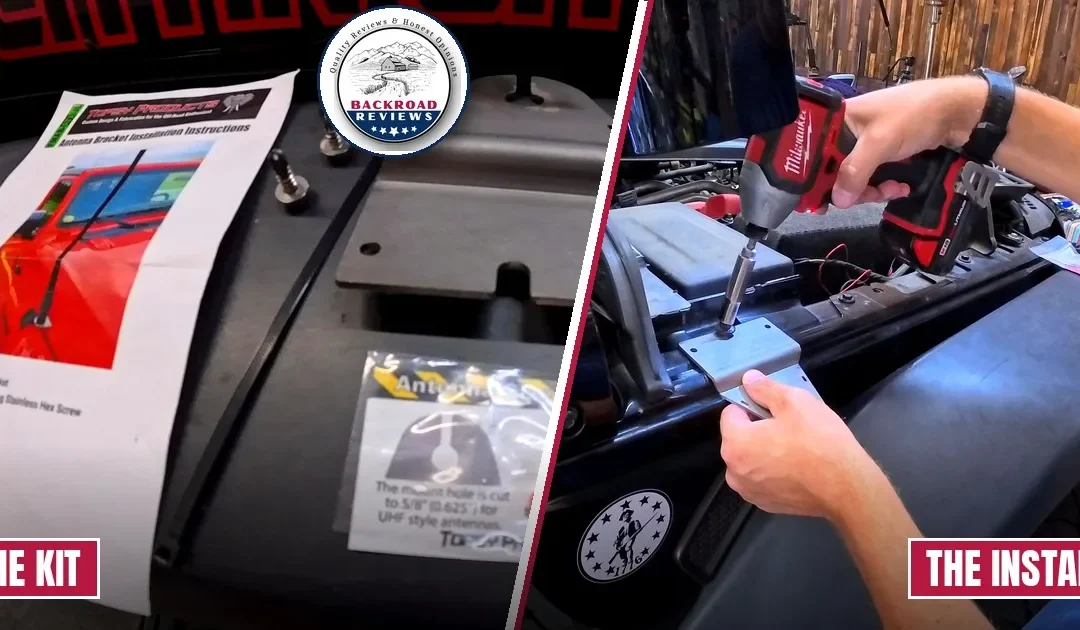
We installed the Topsy Products FMAB-ATX heavy-duty fender antenna bracket on a Jeep Wrangler: what’s in the kit, how to drill and mount it, and wire routing.
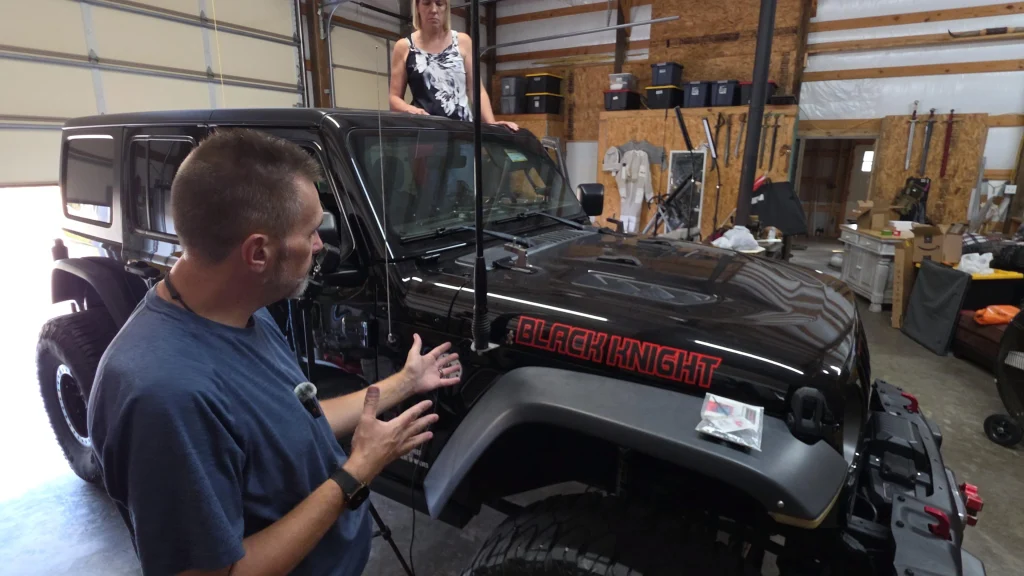
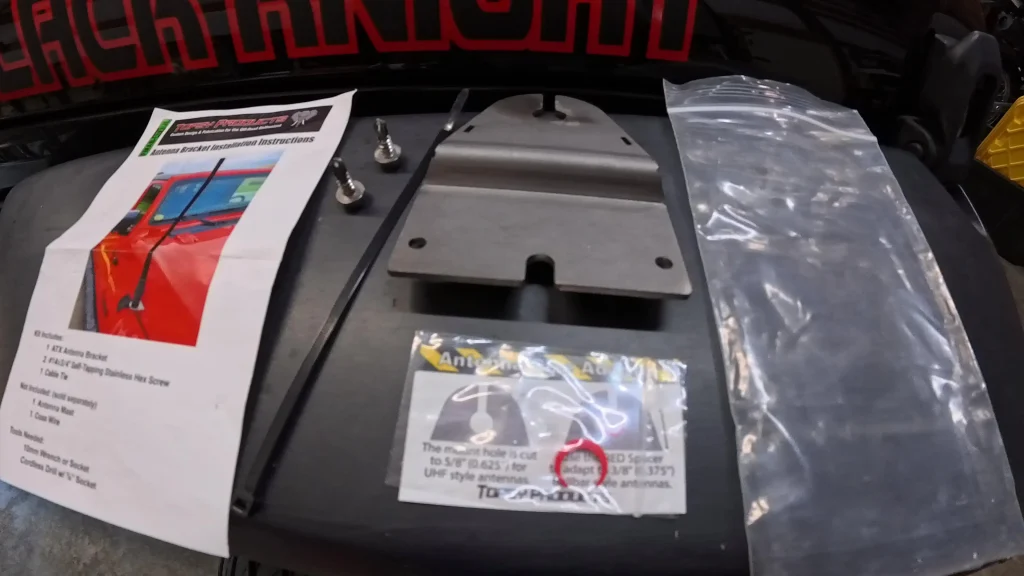
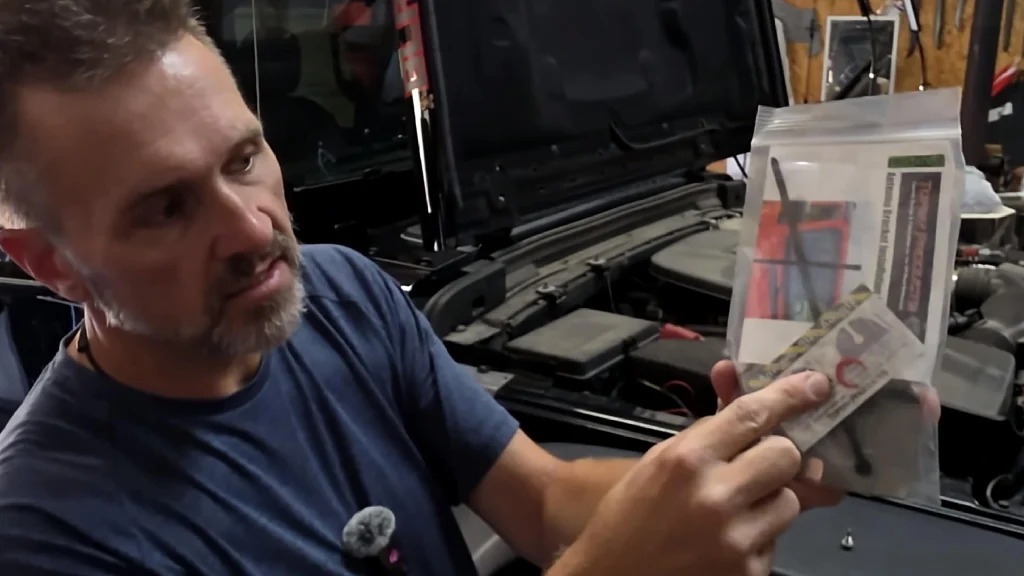
If you run a bullbar or UHF-style antenna on a Wrangler, you need a solid place to mount it. In this video Ryan installs the Topsy Products FMAB-ATX fender mount antenna bracket on the black “Black Knight” Jeep Wrangler and shows every step from the 10 mm fender bolt to routing the antenna wire.
What is the FMAB-ATX?
The FMAB-ATX is Topsy Products’ fender mount antenna bracket for bullbar and UHF-style antenna systems. Per Topsy’s product page, it’s made from 11-gauge stainless steel, has a 3/8″ cutout for most bullbar antennas and a 5/8″ cutout for UHF SO-239-style antennas, and is designed for JL, JT, and JK Wranglers. Topsy lists it as compatible with the Midland Highland Bullbar, Melowave Overlander GMRS Mobile, and Alamoso GMRS Rugged antennas.
A small red spacer adapter so the mount fits a larger or smaller antenna stud
Not included: the antenna and the coax wire.
What makes it different
Ryan points out three things: the metal is thicker, it uses two self-tappers, and it has two slits for a zip tie to hold the antenna wire in place.
Tools we used
10 mm wrench or socket
Cordless drill
A cobalt-coated drill bit
Cutting oil
An impact driver or drill with a 3/8″ socket for the self-tappers
Something to clean the fender with
How to install it
1. Loosen the fender bolt and clean the surface
Use a 10 mm to loosen the bolt on the fender. Clean the dust and debris off both the mount and the fender, then slide the bracket underneath.
2. Seat it flush and remount
Make sure the bracket sits flush, then tighten the fender bolt back down.
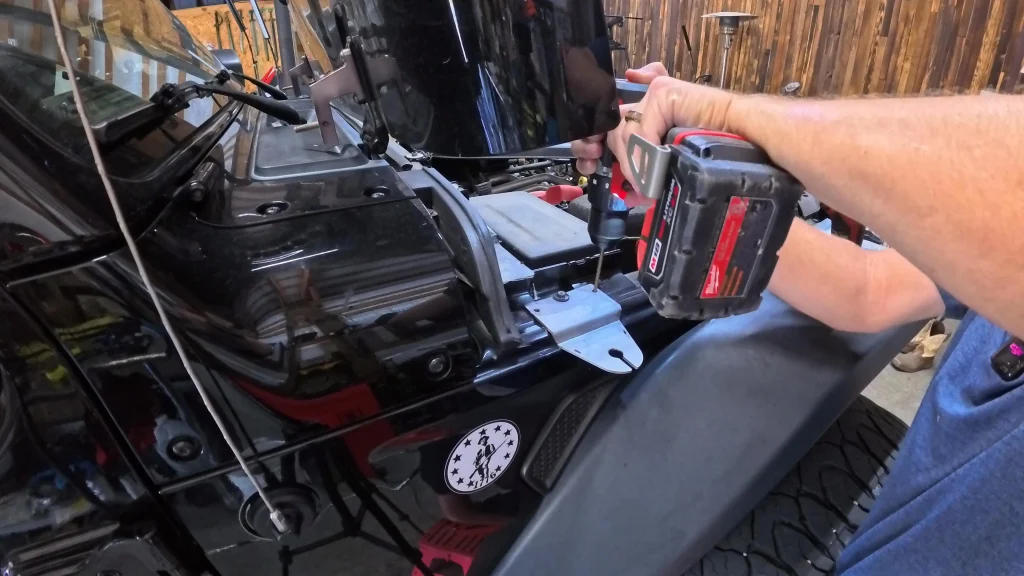
3. Drill a pilot hole
The self-tappers go through two layers of metal, so Ryan drilled a pilot hole first with a cobalt-coated bit and a little oil. As he says in the video, it’s quite a bit easier with a drill bit, and it makes driving the self-tapper a lot easier.
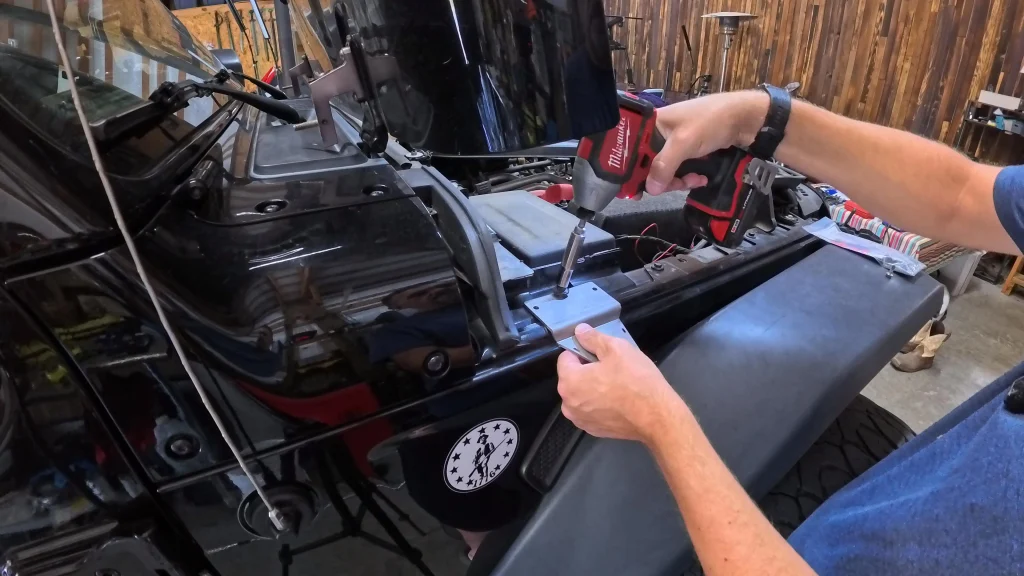
4. Drive the self-tappers
Use a 3/8″ socket to drive the self-tapping screws in.
5. Clean up the shavings
Wipe off the surface and get the metal shavings out. The mount is now ready for an antenna.
6. Mount the antenna
For the demo, Ryan installed a bullbar antenna mount with the large spring, without the red spacer adapter, using a washer, lock washer, and locking nut. Then the antenna goes on.
7. Check hood clearance
Close the hood and check for spacing issues. In our install, the bracket sat on the lip of the fender at what Ryan called “a perfect 90 degree angle.”
8. Route and secure the wire
Zip tie the antenna wire to the mount with the included tie and cut off the extra. We routed ours up and through the windshield. Depending on your setup, you might go through the firewall into the engine compartment, or take the cowl off and go up through the windshield, depending on where your radios are.
Our take
Ryan calls it an “extremely nice mount” that holds really large antennas. In his words, “Topsy product mounts are the best in the industry,” and with this heavy-duty antenna, “you can drive it at highway speeds.”
Wrap-up
If you want a sturdy fender mount for a bullbar or UHF antenna on a JL or JK, the FMAB-ATX installs with basic hand and power tools. Watch the full video above to see each step.
Affiliate disclosure: This post contains affiliate links. As an Amazon Associate I earn from qualifying purchases, at no extra cost to you. Smooth-On did not sponsor this video or post. We bought the foam with our own money.
How to Fix Pontoon Seat Holes with Smooth-On FlexFoam-iT! X
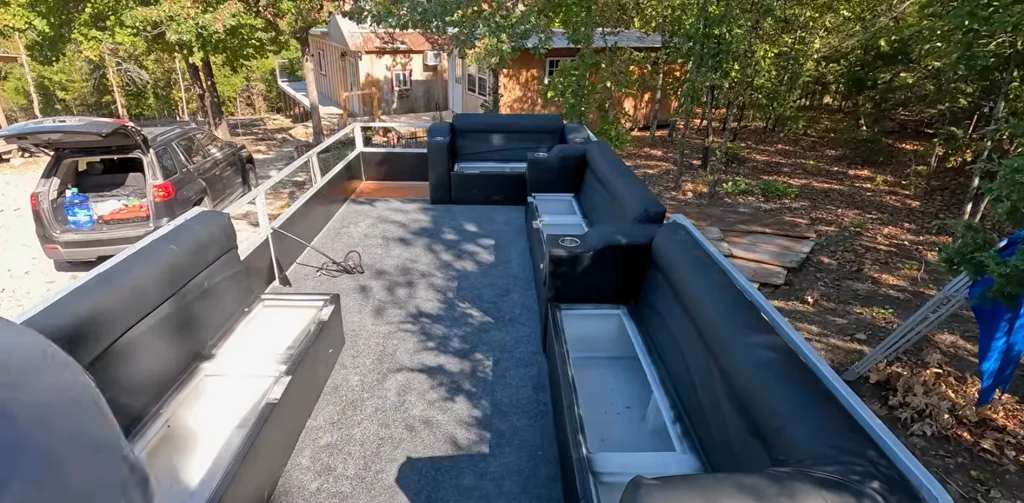
Our friends Jason and Tara of White Rock Homestead picked up a new-to-them pontoon and are redoing nearly everything on it. One big job was the marine fabric on the seats, which had a bunch of holes. We bought a two-part pour foam, filled the holes, and recorded the whole thing so you can see how it goes.
What we used
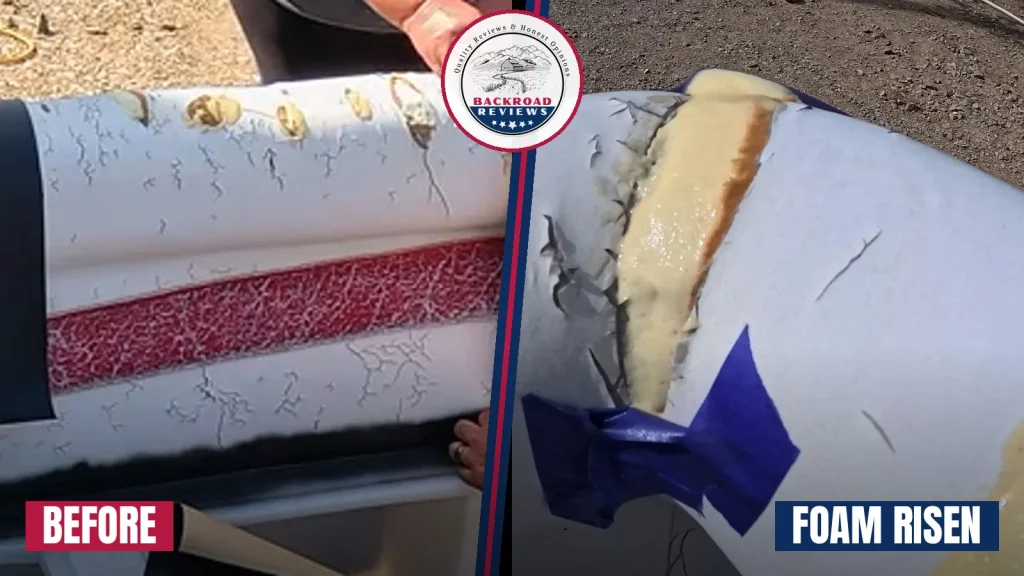
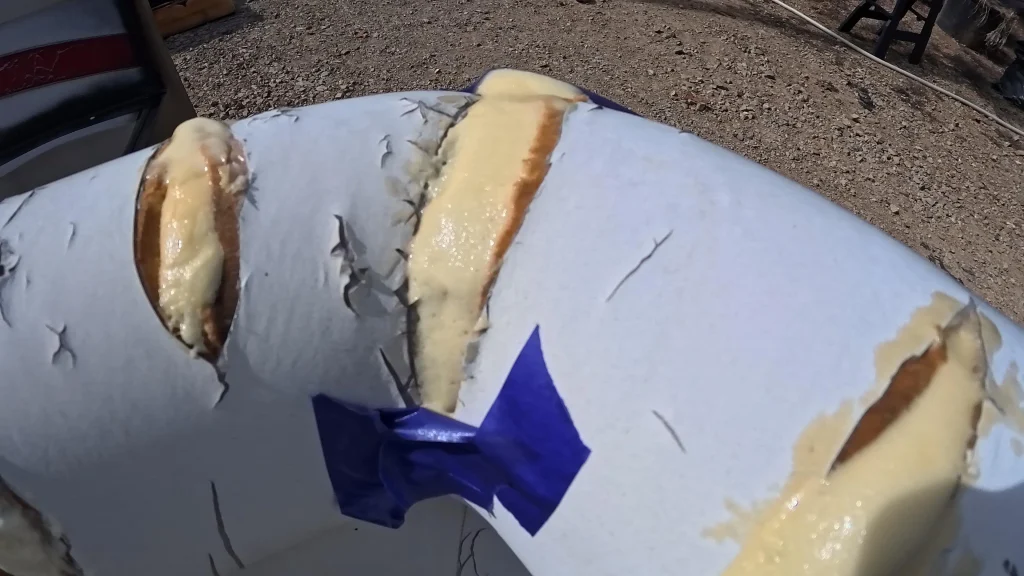
Foam risen, before trimming.
Smooth-On FlexFoam-iT! X is a two-part flexible foam. We used the 10 lb version, which is close to the foam already under the seat fabric. It’s a closed-cell foam, so it doesn’t soak up water and it shrugs off moisture.
You can also order small kits straight from smooth-on.com. Smooth-On sells small sizes of its foams and mold-making materials, which is handy if you’re just trying one project.
Not sponsored: Smooth-On did not pay for this. We bought the foam ourselves. Ryan already uses it to make arrowheads and props for live-action roleplay, so he had some on hand when Jason and Tara needed help.
What you’ll need
FlexFoam-iT! X, Part A and Part B
Disposable gloves (more on this below)
Small mixing cups
A stir stick
A small screwdriver to poke a pour spout in the Part A seal
Rags for wiping up
A well-ventilated spot
The pontoon deck. Frame from [White Rock Homestead’s video](https://www.youtube.com/watch?v=JXMYjYCRJi4).
Step by step
1. Plan the pour
You mix equal parts by volume, one part A to one part B. The plan is to overfill the hole a little, then cut the foam back so you can’t tell where the hole was. We worked in small batches, one small cup at a time.
2. Gloves on
Wear gloves. The mixed foam is like syrup and it gets everywhere. Ryan’s tip came from experience: it glues very well, and it doesn’t wash or wear off your skin.
3. Open Part A only when you’re ready
Once Part A is open to air, it starts to harden, so don’t open it until everything else is set up. Shake it well. Then poke a small hole in the seal with a screwdriver to make a pour spout, so as little of it is exposed as possible. Keep rags handy, because something will drip.
4. Measure and mix
Part B is a little more syrupy than Part A. In the video we used tablespoons to measure equal amounts of each. You can add coloring to the foam, but since this was getting covered up, we skipped it. Put the cap back on Part A before you pour Part B.
5. Pour fast
You don’t get much working time. The foam starts to expand quickly, and you can see it start to take on air within seconds. If a hole is tilted, you may need to angle the seat to get the pour where you want it.
6. Let it rise
If the foam doesn’t rise well, it usually means it wasn’t mixed correctly. When Ryan asked if the foam doubles, Ryan’s answer was that the 10 lb foam ends up about twice as thick as when it started. Check Smooth-On’s spec sheet for the manufacturer’s numbers before you plan how much to pour.
7. Cut it back
The plan, as Ryan says in the video, is to let the foam overfill and then cut it back flush. Plan on trimming once it has cured.
Safety and tips
Ventilate. It doesn’t smell strongly or off-gas heavily, but don’t use it in a confined space. Urethanes and silicones generally call for ventilation.
Small batches. We poured small batches at a time.
Keep Part A off the threads. Part A on the bottle threads will seal the cap shut for good.
Read the manufacturer’s instructions and safety data on Smooth-On’s site before you start.
Wrap-up
For filling holes in pontoon seat foam, a two-part pour foam is simple and cheap to try. If you have a project you think it might work for, tell us in the comments on the video.
Thanks to Jason and Tara at White Rock Homestead for letting us work on their pontoon.
By Ryan, Backroad Reviews · Mountain Home, AR Categories: Automotive Tires, Automotive Products, 4X4 Products, Vehicles And Farm Implements
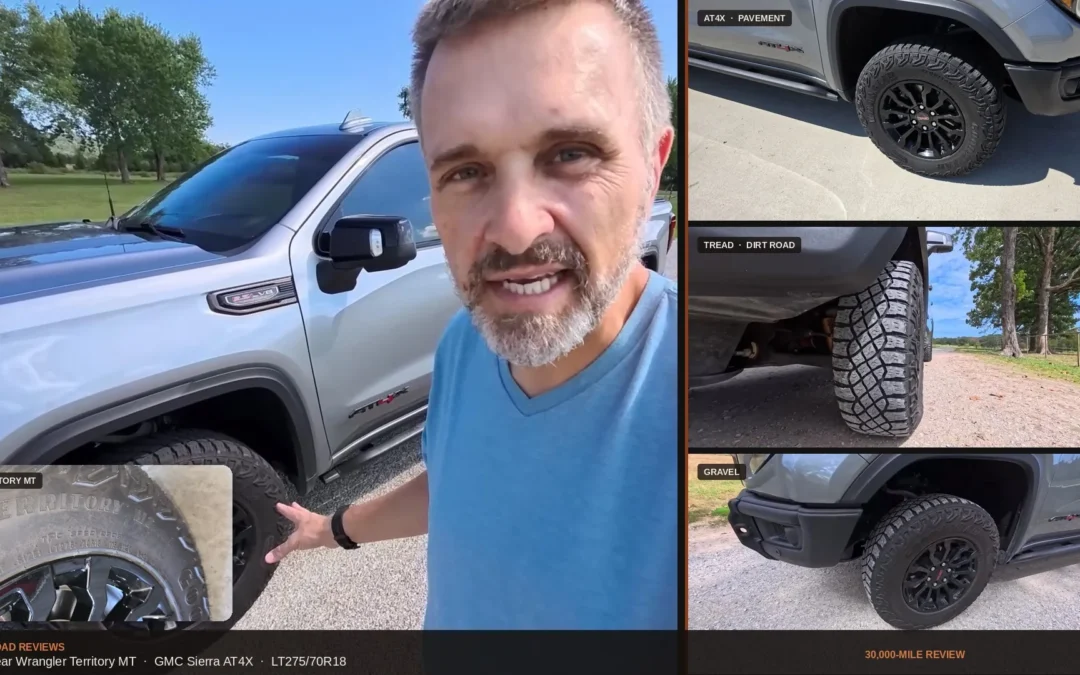
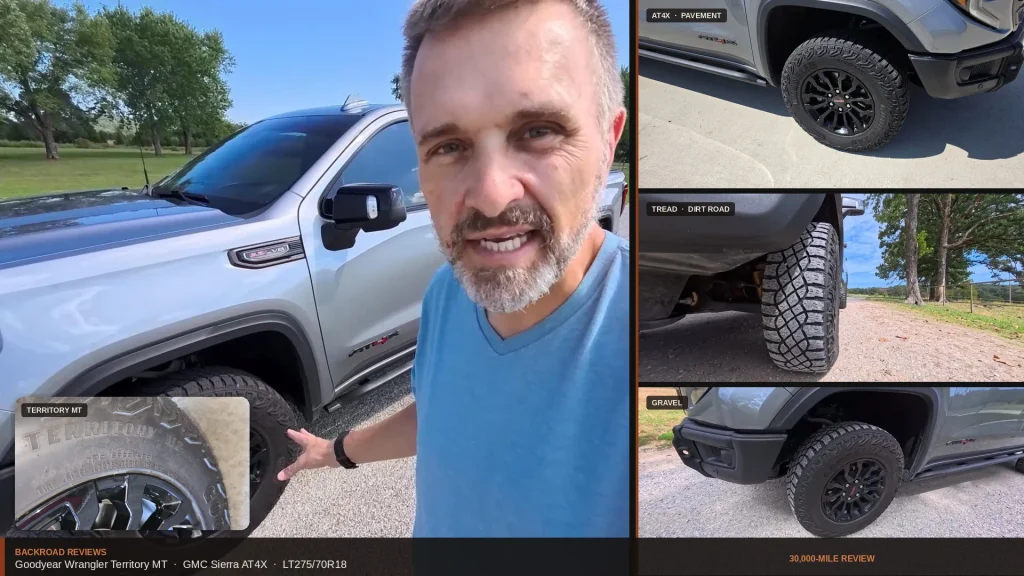
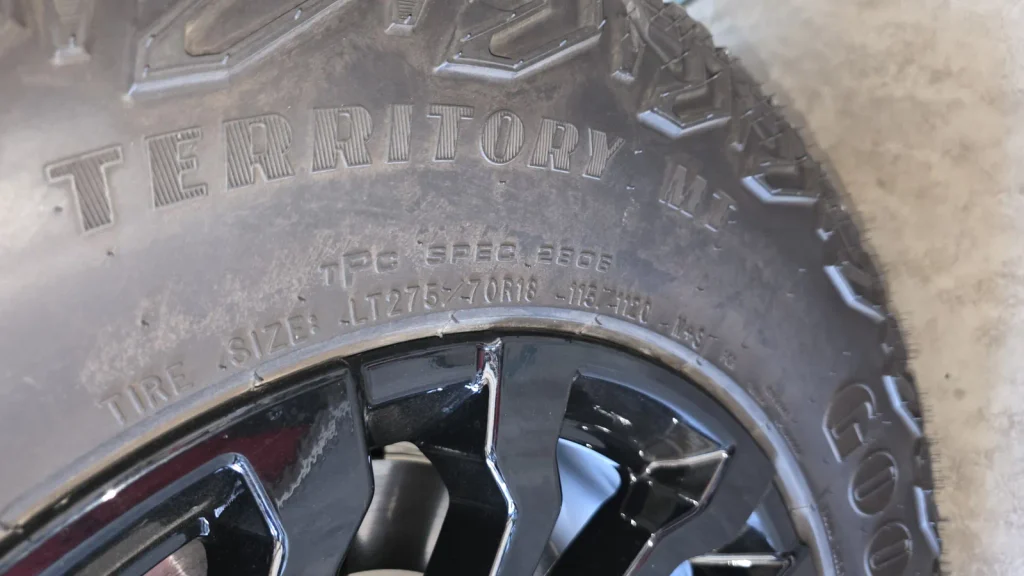
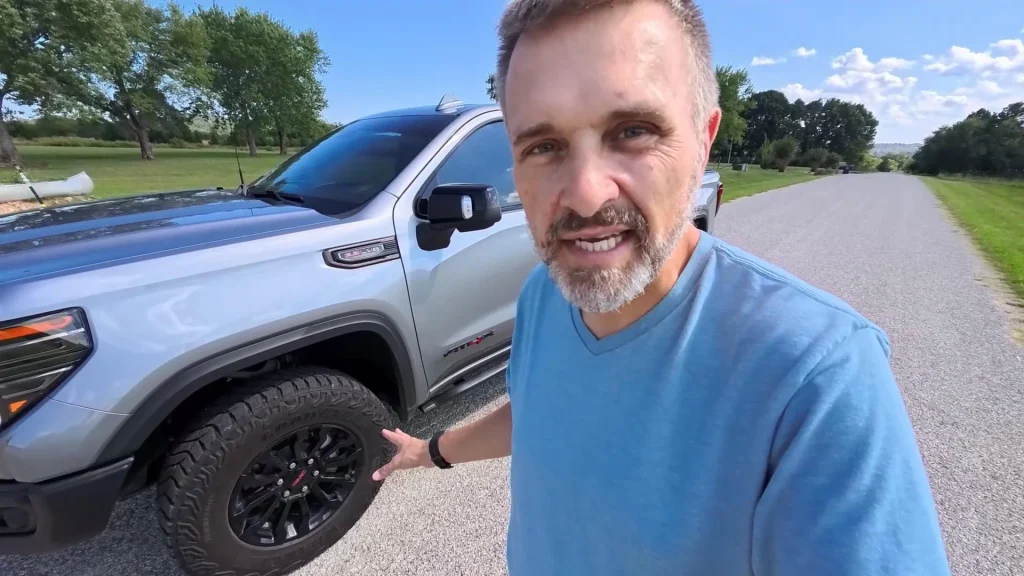
Hey, it’s Ryan from Backroad Reviews, and in this review we’re going to take a look at the Goodyear Wrangler tire — the tire that is on a lot of vehicles. The specific model we have been running is the Territory MT.
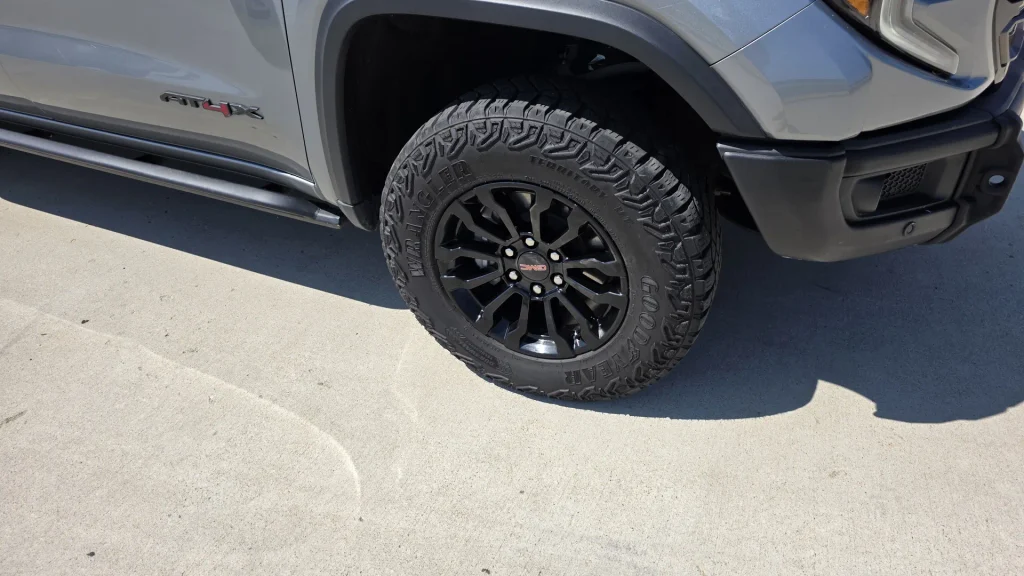
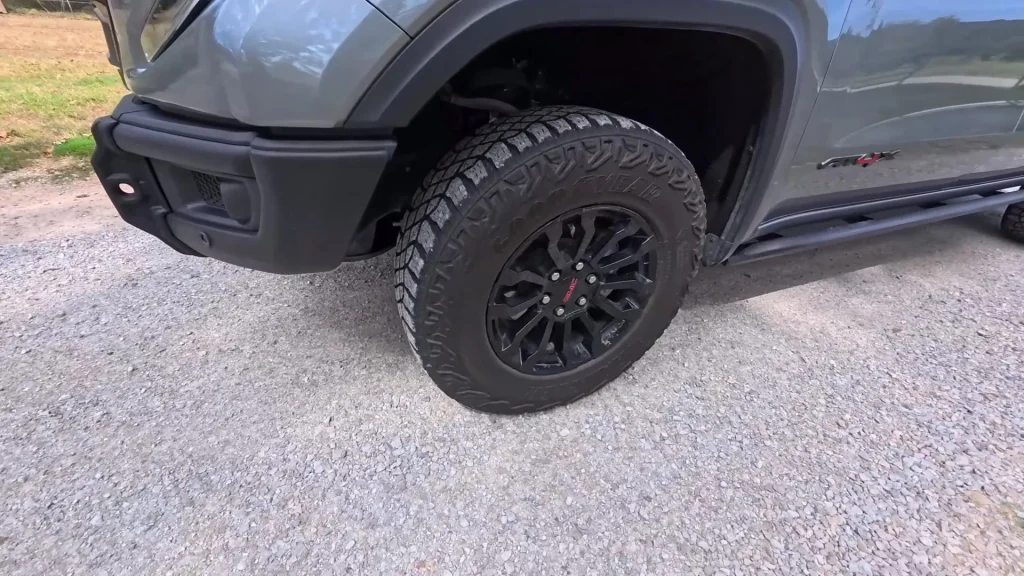
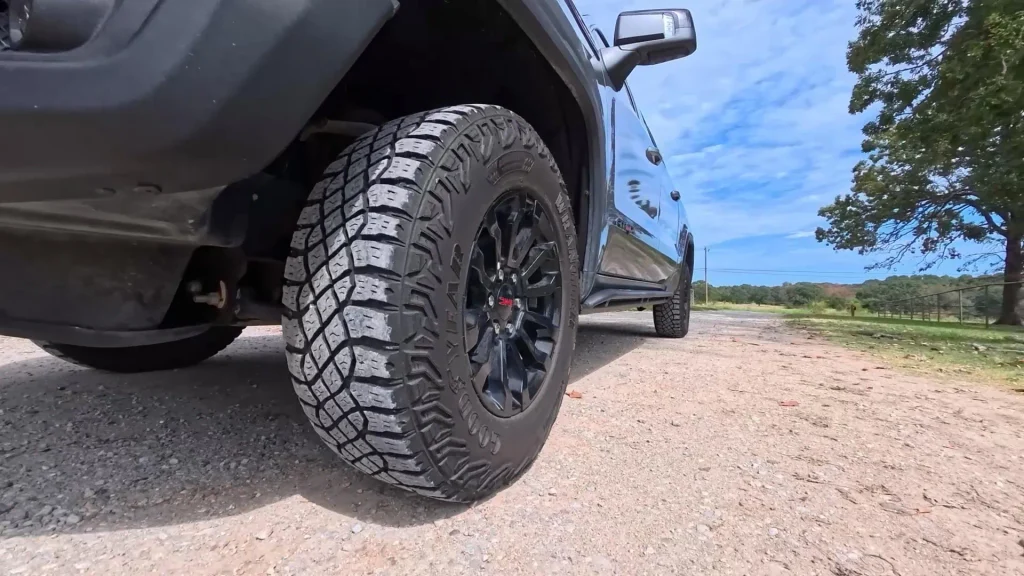
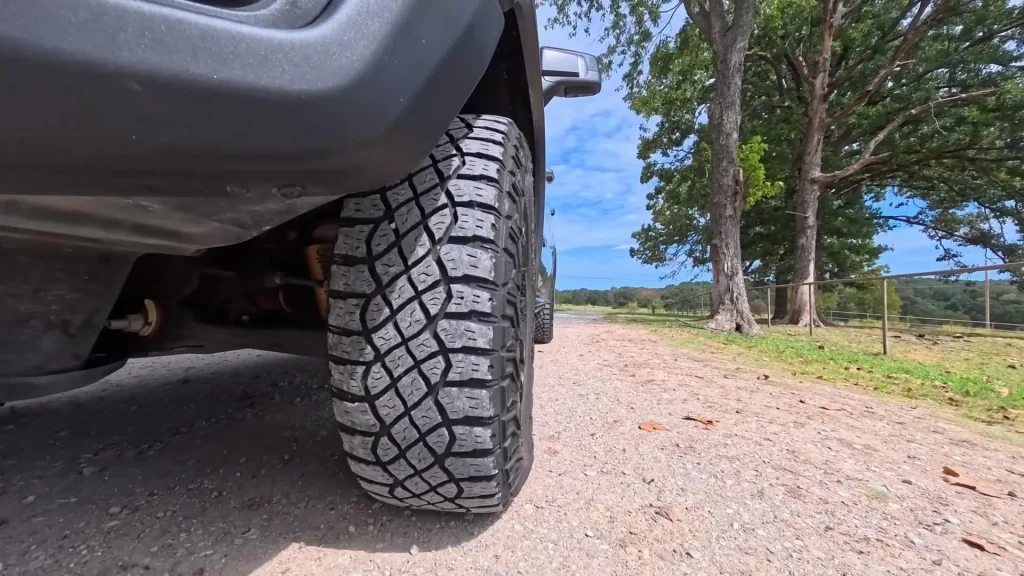
It has DuraWall technology, an aggressive tread pattern, and sidewall nubs that help you get through deeper mud. We have had this set for about 30,000 miles. It’s wearing excellently. We rotate them every 6,000 miles. They’re lightweight, they’re quiet on the road, and they’re absolutely awesome on the trail — both gravel and dirt.
Short version: highly recommend the Goodyear Wranglers. Territory MTs is what this specific model is. You cannot go wrong with this tire.
This post contains Amazon affiliate links. If you purchase through those links, Backroad Reviews may earn a small commission at no extra cost to you. As an Amazon Associate, we earn from qualifying purchases.
Amazon.com: Goodyear Wrangler Territory MT LT305/70R18 E/10PLY Light Truck & SUV Tire | Light Truck Mud Terrain All Season Traction 126R Rated E (10 Ply) Radial Construction Black Sidewall Tire
What the Territory MT actually is
The Wrangler Territory MT sits in that useful middle of the Wrangler family. It is more aggressive than a highway or mild all-terrain tire, and less specialized than a hardcore rock-crawler like the Wrangler MT/R with Kevlar. Goodyear positions it as a mud-terrain / maximum-traction tire for light trucks and SUVs that still have to live on pavement during the week.
You will see these as original equipment on vehicles that are supposed to look and work like trucks — Ford Bronco packages, Chevy Silverado ZR2 trucks, and a lot of aftermarket replacements on F-150s, Tacomas, 4Runners, Jeeps, and Tundras. That is why we called them “the tire that are on a lot of vehicles.” They are not boutique off-road-only rubber. They are the tire a lot of people already have, and a lot more people are shopping as a replacement.
The Amazon listing we are pointing to is the LT315/70R17 size (about a 34.4-inch tire). Territory MT is sold in a range of LT sizes from the mid-16s up through 20-inch applications, typically in Load Range C or E depending on the fitment.
What we said on camera
This write-up is built around the same review we filmed. Here is the wording from that video, cleaned up only enough to read on the page:
“Hey it’s Ryan from Back Road Reviews and in this review we’re going to take a look at the Goodyear Wrangler tire — the tire that are on a lot of vehicles. It has the DuraWall technology and it is one of the best tires you can put on your truck or SUV. If you take a look it has a very aggressive tread pattern. It has sidewall nubs on it to help you get through some of that deeper mud. There again, DuraWall technology. And we have had this for about 30,000 miles. It’s wearing excellently. We rotate them every 6,000 miles. And they’re lightweight, they’re quiet on the road, and they’re absolutely awesome on the trail — both gravel and dirt. So highly recommend the Goodyear Wranglers. Territory MTs is what this specific model is. You cannot go wrong with this tire. My name is Ryan. You’re watching Backroad Reviews. Thanks for watching.”
That is the review. Everything below is the longer version — what those claims mean, where other owners agree, and where they do not.
Goodyear Wrangles 3 New All-Terrain Tire Choices for Work and Play | GearJunkie
Design: tread, sidewall nubs, and DuraWall
Open tread and wrap-around shoulders
The Territory MT uses a wide-open block pattern with a high void ratio. That is the mud-terrain part of the equation. Wide lateral grooves give the tire somewhere to push mud, slop, and loose dirt instead of packing the face of the tire into a slick hockey puck. Wrap-around shoulder lugs — the “sidewall nubs” in the video — bite when you are in a rut, airing down, or climbing out of a hole where the tread face is no longer the only thing touching the ground.
Goodyear also uses a sequenced pitch pattern on the tread blocks. That is the quiet-on-the-road claim. Instead of every lug slapping the pavement at the same interval, the block sizes are varied so the drone is less of a single note. It does not make this a touring tire. It does make it livable on a two-hour highway run, which is more than you can say for a lot of true mud terrains.
DuraWall technology
DuraWall is Goodyear’s name for a reinforced sidewall package meant to resist cuts, scrapes, and punctures off-road. On camera we called it out twice because that is the part you actually notice when you walk around the truck after a rocky trail: the sidewall still looks like a sidewall. It is not the same thing as a three-ply Kevlar rock-crawler sidewall. Do not treat it like armor plate. Treat it like a tougher-than-average light-truck sidewall that is designed to take gravel spray, brush, and the occasional sharp edge without folding.
On the road: quiet, light, and still an MT
Our line in the video was simple: they’re lightweight, they’re quiet on the road. That has held up for us. Compared with a dedicated mud tire that howls at 70 mph, the Territory MT is in the quieter half of the class. You still hear tread. You can still hold a conversation and listen to the radio. That is the bar that matters on a daily driver that also sees dirt.
Other owners are more split on noise than we are, and that is worth saying out loud. Tire Rack survey data puts noise around the mid-6s out of 10 — “good,” not “quiet.” SimpleTire reviewers repeatedly call them “a little noisy” or “noisier than the Territory AT they replaced.” One F-150 owner reported more than 3 mpg lost versus the Territory AT in the same size, plus stones getting picked up and thrown at highway speed. That is a real MT trade-off. If your truck lives on the interstate, an all-terrain will be quieter and cheaper to feed. If your truck splits time between pavement and gravel, the Territory MT is the compromise we are willing to live with.
Dry pavement grip is a strong point for the class. Wet grip is acceptable if you drive like you are on a truck tire, not a sport sedan. Ice is the weak surface. This is an M+S tire, not a 3-Peak Mountain Snowflake winter tire. Light snow and slush are fine. Black ice is not what this tread is for.
Goodyear Wrangler Territory MT Review: Real-World Performance for Trucks and SUVs
On the trail: gravel, dirt, and mud
“Absolutely awesome on the trail — both gravel and dirt.” That is the part we stand behind without hedging.
On gravel roads the open blocks find purchase instead of skating. On hardpack dirt they feel planted. In moderate mud the wrap-around shoulders and self-cleaning voids do what they are supposed to do. Where this tire is not the king is deep, thick, soup-bowl mud. A more specialized open-lug mud tire will out-paddle it there. Same story on serious rock crawling: you can do mild rocks. You should not pick this as your only tire for a week in Moab on ledges.
That is the correct way to think about the Territory MT. It is a do-it-all truck tire with real off-pavement ability, not a trophy-truck mud tire that happens to have a DOT number.
Wear at 30,000 miles
We have about 30,000 miles on this set. It is wearing excellently. We rotate them every 6,000 miles. That rotation schedule is not optional if you want even wear on an aggressive tread. Mud-terrain blocks cup and shoulder-wear if you leave them in one corner of the truck for 15,000 miles.
Real-world tread life for this model generally lands in the 25,000 to 35,000 mile window if the truck sees a mix of highway and dirt, and can stretch further if most of the miles are pavement with good alignment. Dedicated highway tires last longer. That is not a knock. That is the category. Goodyear typically covers these with a workmanship and materials warranty, not a big advertised mileage treadwear warranty like you get on a touring tire. Plan on replacing them when the tread is done, not when a warranty check arrives.
Pros
Aggressive tread that works on gravel and dirt, not just in a product photo
Sidewall nubs / wrap-around shoulders that help in ruts and deeper mud
DuraWall sidewall construction for cut and scrape resistance
Quieter and more livable on the highway than a lot of true mud terrains
Relatively lightweight for the look and the capability
Wear holding up at 30,000 miles with 6,000-mile rotations
Strong value versus premium ATs that cost more and do less in mud
Common OE and replacement size coverage for trucks and SUVs
Cons
You will hear them on the highway. Quieter than many MTs. Not quiet like a highway tire
Open tread can pick up and throw stones
Expect a fuel-economy hit versus an AT or highway tire — some owners see 2–3 mpg
Not the tool for extreme rock crawling or axle-deep gumbo mud
Ice traction is a weak point. Do not treat this as a winter tire
No meaningful mileage treadwear warranty. You buy the capability, not a 60,000-mile promise
Pavement-heavy drivers will wear them faster than a touring or all-terrain option
What other reviews say
We do not pretend our driveway is the only data point. Here is how the Territory MT is landing with other owners and survey sites.
Tire Rack surveys: About 84% would buy again. Strong dry traction and off-road scores (dirt 8.4, rock 8.2, sand 8.0, mud 7.7). Ride quality around 7.8. Noise is the soft spot at about 6.3.
SimpleTire: Around 4.3/5 from owner reviews. High marks for dry/wet; noise and stone-throwing show up in the written comments. One F-150 owner noted a 3+ mpg drop versus the Territory AT.
Owner reports: Bronco Wildtrak and Silverado ZR2 OEM users generally like the balance. Common praise: looks, dirt/gravel bite, price. Common complaints: highway sing at speed, no mileage warranty, ice.
Category testers: Repeated theme — not the most extreme MT, but one of the more livable ones. Best for mixed-use trucks. Skip it if you want a silent commute tire or a competition mud tire.
A typical positive review sounds like this: the tire does a little of everything well enough that you stop thinking about it. A typical negative review sounds like this: “They hum at 75 and I commute 80 miles a day.” Both can be true. The question is which life your truck actually lives.
Who this tire is for
Buy it if your truck or SUV sees gravel, dirt, job sites, two-tracks, and moderate mud, and you still drive it to town every week.
Buy it if you want an aggressive look without stepping all the way into a howling, short-lived mud tire.
Buy it if you will rotate every 6,000 miles and keep air in them. That is how we got even wear at 30k.
Skip it if most of your miles are interstate and you care more about cabin quiet and MPG than trail bite.
Skip it if you need a dedicated winter tire or you regularly crawl serious rock.
Quick specs
Model
Goodyear Wrangler Territory MT
Type
Mud-terrain / maximum traction light-truck tire
Linked size
LT315/70R17 113S (approx. 34.4″ overall diameter) — other LT sizes available
Load ranges
Typically C or E, depending on size
Tread depth
About 14/32″ to 17/32″ depending on size
Key tech
Open self-cleaning tread, wrap-around shoulders, sequenced pitch pattern, DuraWall sidewall
Season rating
M+S (mud and snow). Not a 3PMSF winter tire.
Our miles
About 30,000, rotated every 6,000
Warranty
Workmanship and materials; no big advertised mileage treadwear warranty
After 30,000 miles, the Goodyear Wrangler Territory MT is still the tire we would put back on the truck. It looks like it belongs on a working vehicle. It works on gravel and dirt. The DuraWall sidewall and those shoulder nubs are not marketing fluff when you actually leave the pavement. And for a mud-terrain pattern, it stays quiet enough and light enough that you do not dread the drive home.
It is not perfect. Highway noise is there if you listen for it. Stones get thrown. Fuel mileage is not what a highway tire returns. Ice is not its job. If that list bothers you more than the trail list excites you, buy an all-terrain.
If you want one set of tires that can do the back road and the blacktop without embarrassing itself on either, this is an easy recommend. Territory MTs is what this specific model is. You cannot go wrong with this tire.
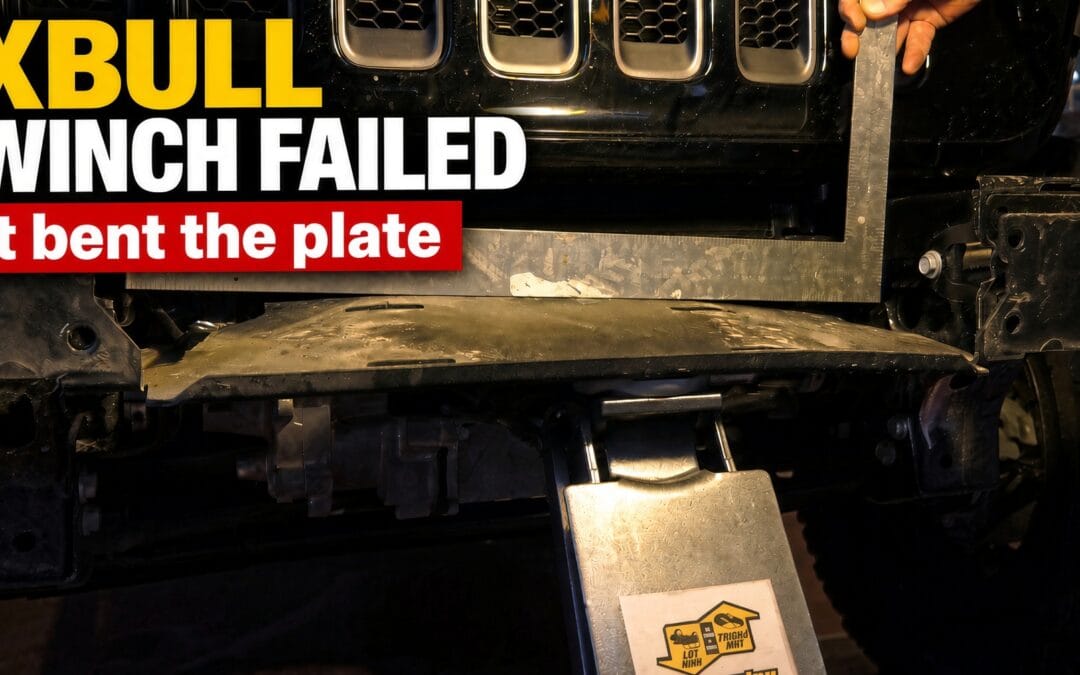
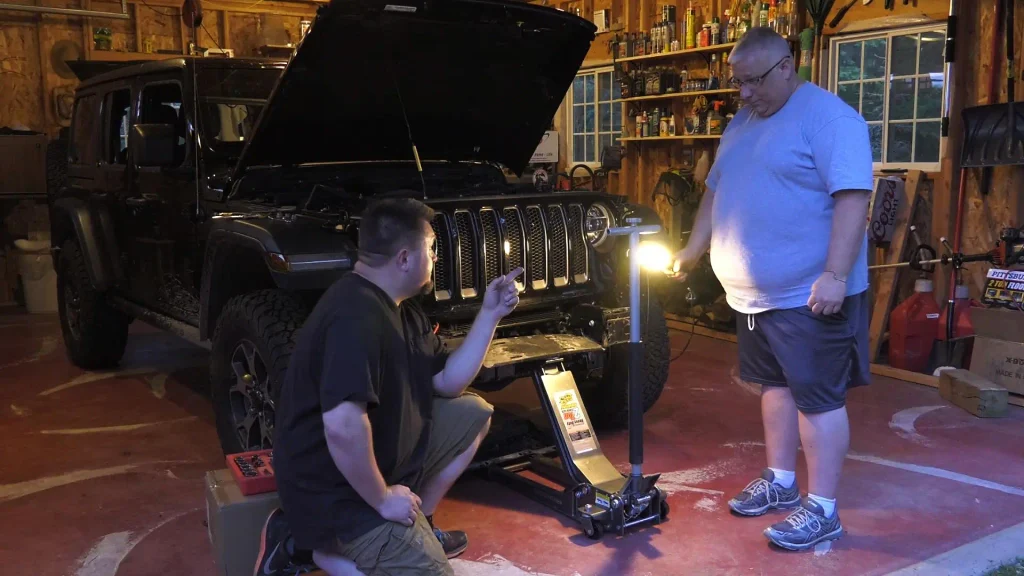
If you watch the video this post is tied to, you already know the punchline: our X-Bull 13,000-pound winch started pulling in on its own. Not once. Sporadically, while we were traveling. The hook was dangling, the line was wrapping over itself, and a 13k winch has more than enough torque to turn a bumper and winch plate into a science project.
Luckily it never hit the ground. Unluckily, it still did a lot of work we never asked it to do.
What actually happened
The winch would retract on its own. We ruled out an obvious short — nothing for the wiring to rub or short against. That left a bad remote, a bad internal control, or a unit that was picking up a signal it shouldn’t have. Whatever the cause, the result was the same: the drum kept winding when it shouldn’t.
The rope itself was a nice 20,000-pound-test synthetic, wound picture-perfect when we started. After the sandwich job? Maybe it’s still usable for dead-pulling something onto a trailer. We would not trust it in a real recovery.
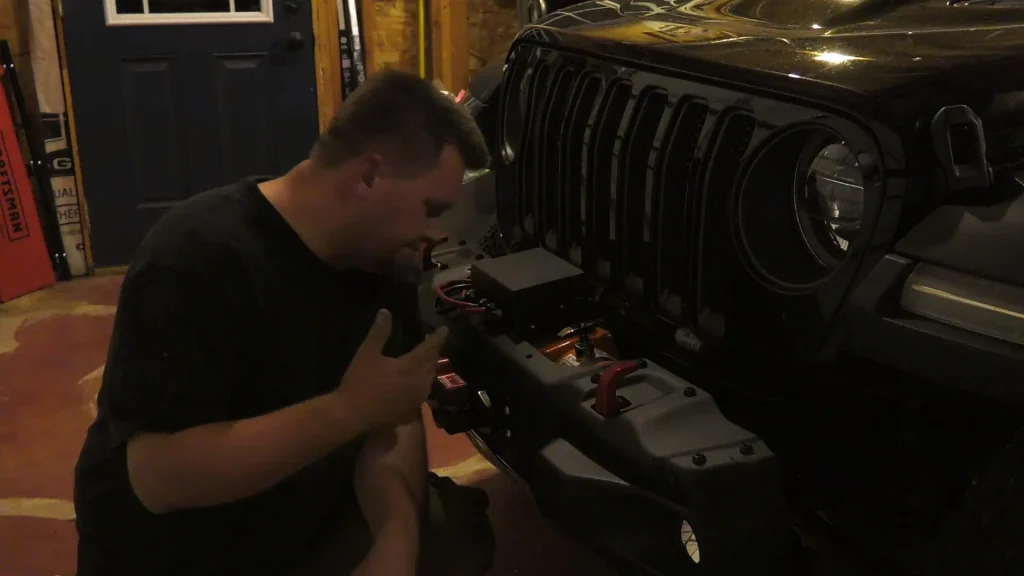
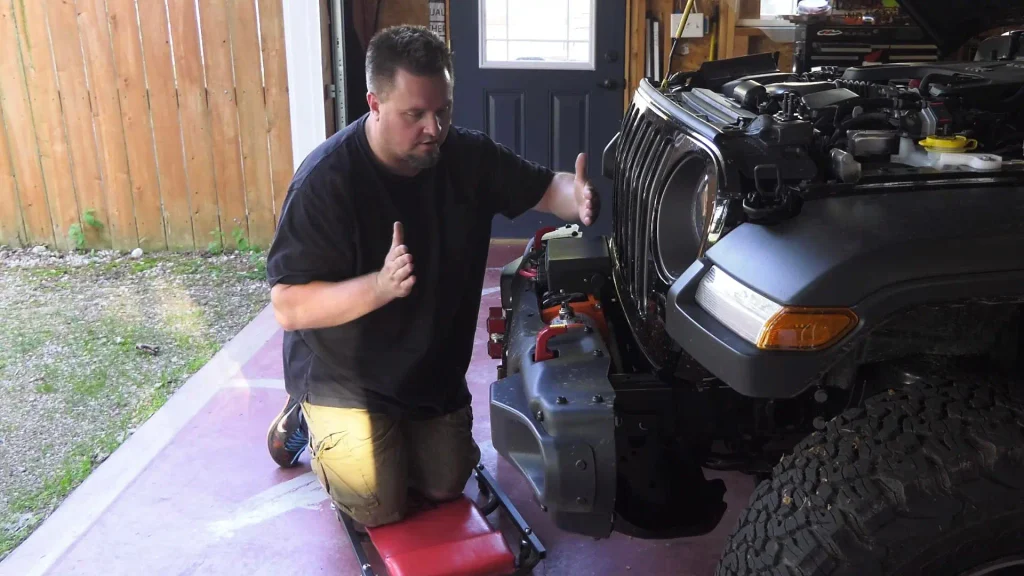
The bumper took the hit. The front got smashed in. The plate came up off the mount. A whole sheet of steel got yanked forward. Bolts stayed in and stayed relatively straight. We didn’t see stress cracks in the paint or obvious weld damage on the frame. That’s a credit to the JCR Off-Road JL winch plate — high-quality steel, no rips, powder coat that took a beating without looking like it failed. The mount holding together under a runaway 13k winch says a lot about how that plate is built.
Getting the old winch off was ugly. The plate was bowed. Bolts were a little tweaked. We eventually got it out, flipped the plate, and used a floor jack to work some of the bend back out. Steel like that can be manipulated. Strength is reduced after that kind of event — we know that — so we inspected for pinched spots and cracks before putting anything back on. For full disclosure: if this were a customer truck, we’d still send the plate to an authorized shop or back to JCR and let them look at it. They’re going to ask what we did to their part. Fair question.
After many painful hours the bumper went back on. It was still tweaked. Everything fought us.
The replacement
X-Bull did send a new winch. We appreciate that. Credit where it’s due.
It was not a one-email, one-box, done deal. There was back and forth. There was a stretch where it was not obvious we were going to get a replacement at all. We kept after it, and they came through. That matters. A lot of budget winch brands don’t.
We still don’t have a clean root-cause answer from the unit itself — remote vs. internal vs. “whatever it is.” The video is us digging in, not a lab teardown.
Why we didn’t stay with X-Bull
A winch that can energize itself while you’re rolling down the road is not a “cheap winch quirk.” It’s a vehicle-damage and people-safety problem. The damage happened fast. A lot of times you don’t even see it starting.
We’ve since gone with a different brand. Price is not the only spec that matters when the failure mode is “it runs when nobody asked it to.”
If your winch starts acting weird
Disconnect power immediately. Do not let it keep over-tightening. Do not assume it will stop. A 13,000-pound motor will rearrange steel in a very small amount of time.
Live and learn. Check your remote, your solenoid/control box, your wiring, and your battery connections. If anything feels intermittent, kill the circuit until you know why.
JCR’s plate earned our respect in this mess. X-Bull earned a replacement unit after we pushed. The original winch did not earn a second chance on this Jeep.
That’s the review. Watch the video for the bent plate, the fairlead that folded without cracking, and the part where hammers become part of the tool list. We’ll see you in the next one.